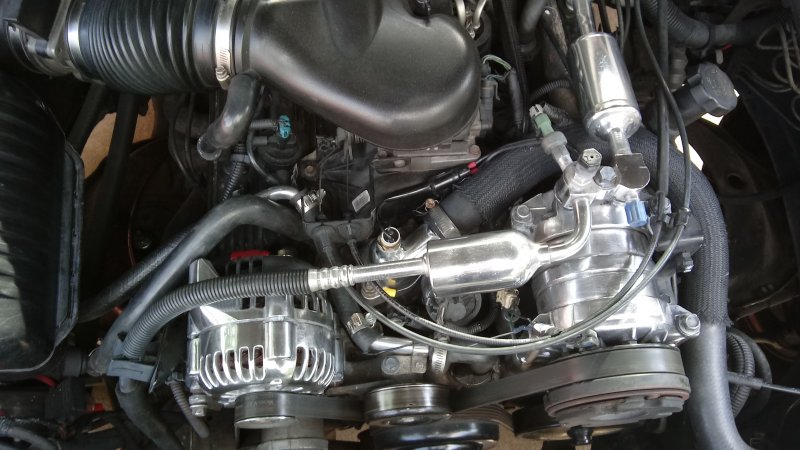
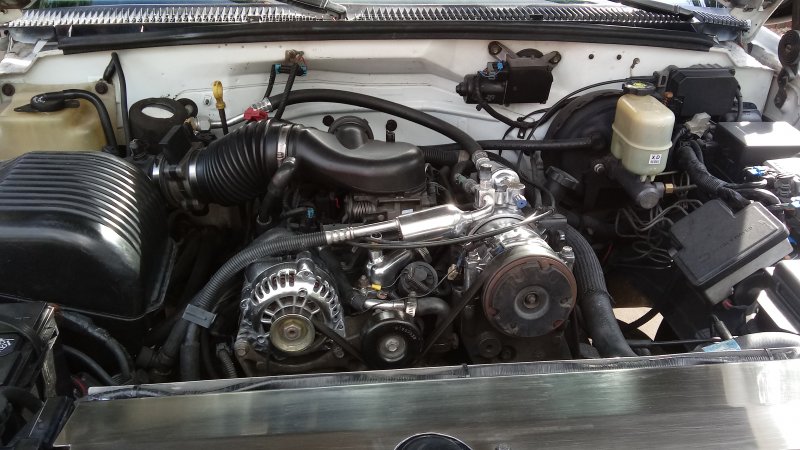
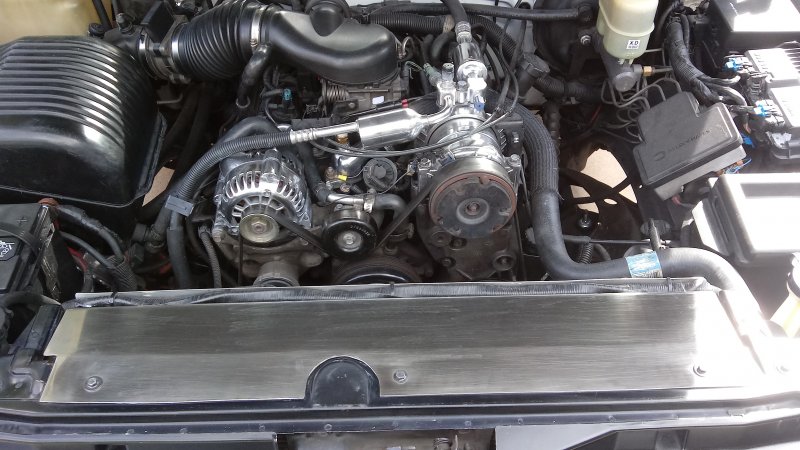
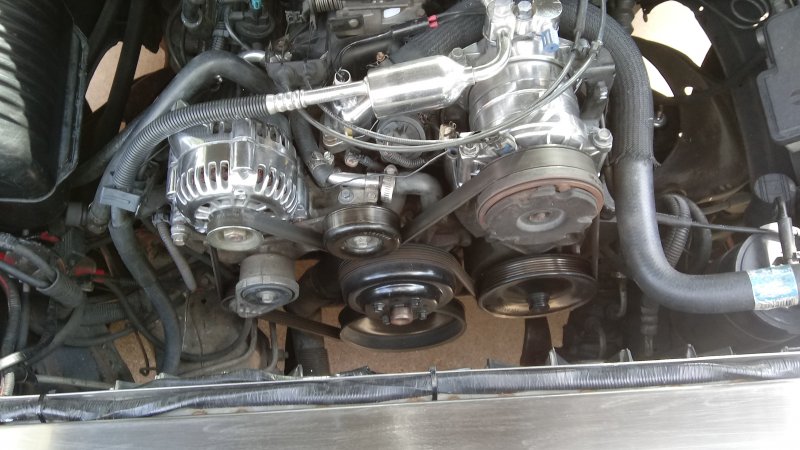
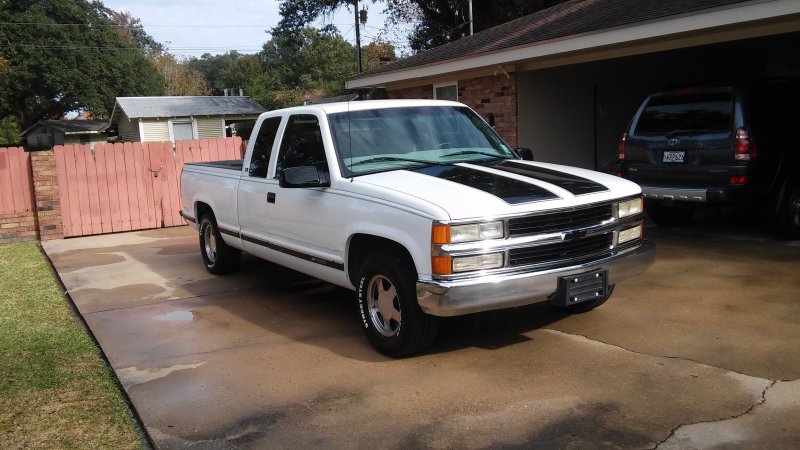
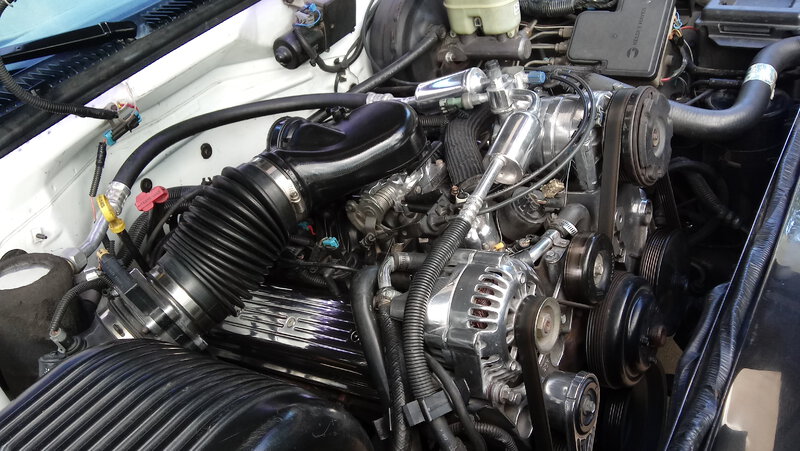
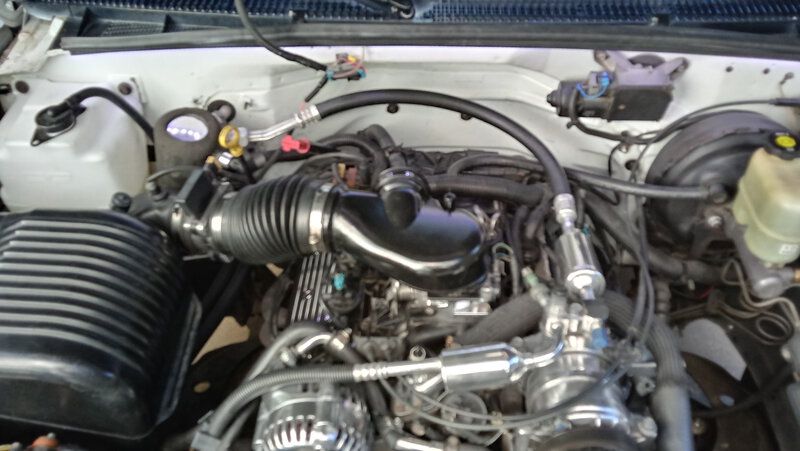
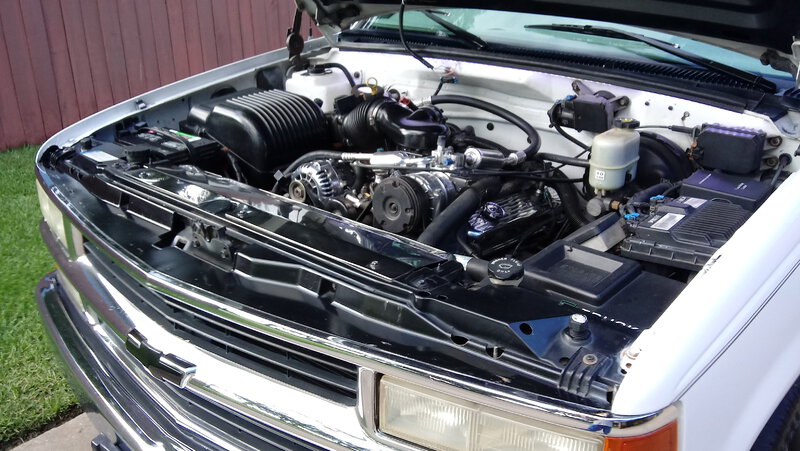
Ive been doing some aluminum buffing under the hood on my 97, Silverado. All polished parts are OE replacement parts that I bought at Orileys. I sanded and buffer them to this finish. What do you guys think.
-
FREE SPEECH SOCIAL MEDIA
If you're looking for a Free Speech Social Media site, check out Blabbook.com
- NO FACT CHECKING - NO SHADOW BANNING - NO POINT OF VIEW CENSORSHIP
Shining & polishing under the hood
- Thread starter kennythewelder
- Start date
-
- Tags
- detailing
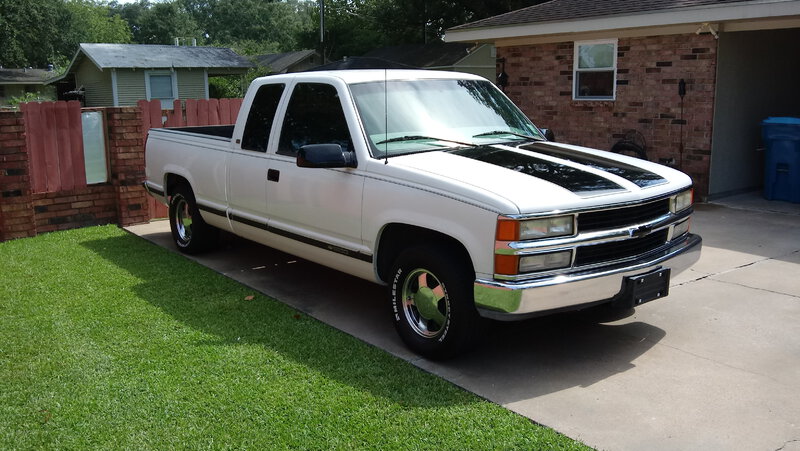
Thank you. I drive my old truck every day. It is my daily driver. Its a 1997. In Louisiana, a truck or car is a classic at 25 years, so I'm getting close.Truck is looking sharp............and clean!!!
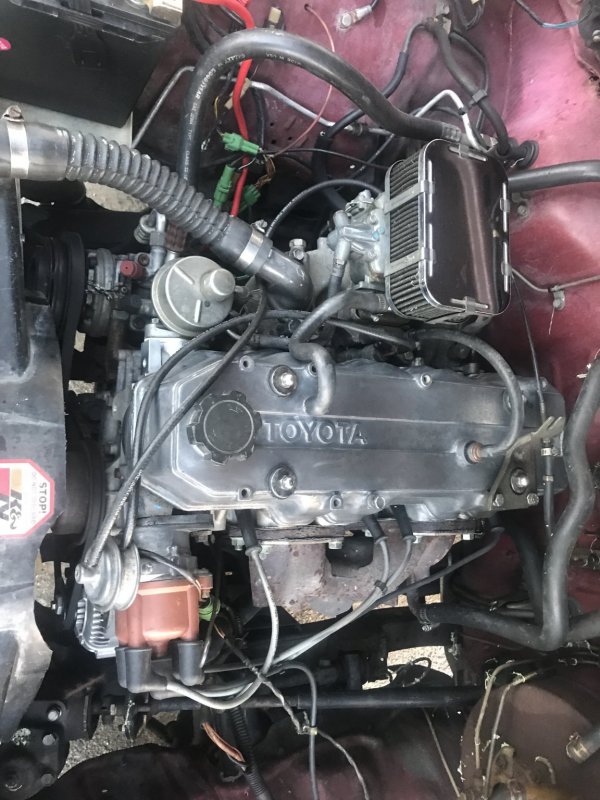
After I posted these pics on www.gmt400.com ( a forum just for GM truck with 1988 to 1998 body styles only) I guy replied with a pic of his Toyota that He polished out.
All clean and shimmeryIve been doing some aluminum buffing under the hood on my 97, Silverado. All polished parts are OE replacement parts that I bought at Orileys. I sanded and buffer them to this finish. What do you guys think.View attachment 8677 View attachment 8678 View attachment 8679 View attachment 8680 View attachment 8681
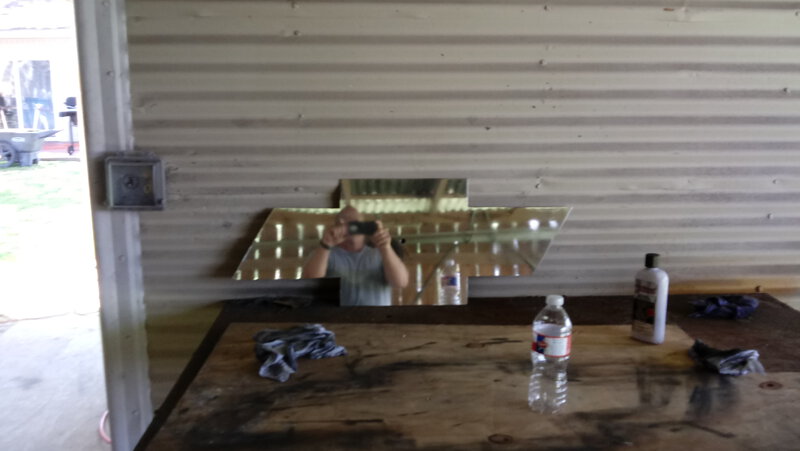
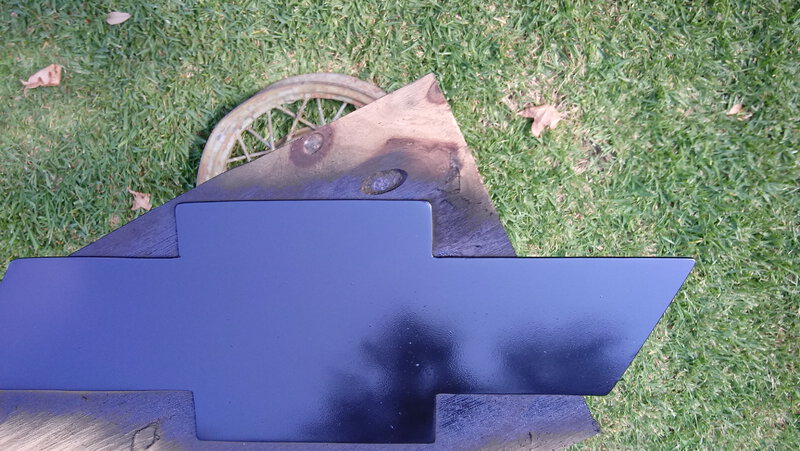
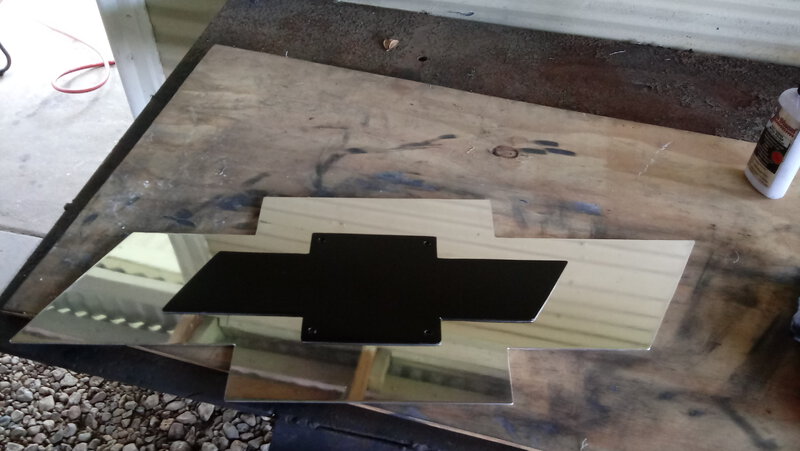
So here is my next project. These are 2 different bowties. I am going to pull of my under hood insulation and coat it with bed liner, then reinstall it, and put the bowtie in the center more or less. I put some rope LEDs on the smaller one tonight and it looked good. Im not sure, but was kind of thinking about outlining both bowties with rope LEDs, and have them come on when you open the hood. Or I may just do the big one and leave the little one off. I think I can attach the bowtie with the same style black clips that hold the insulation. Glue the clips to the back of the bowtie with some contact cement where they wont show, and I will use the OE under hood light socket to actuate the LEDs. I can hide the wires under the insulation. The bowties are aluminum so they are not that heave, and I will polish them out first so they will look like chrome.
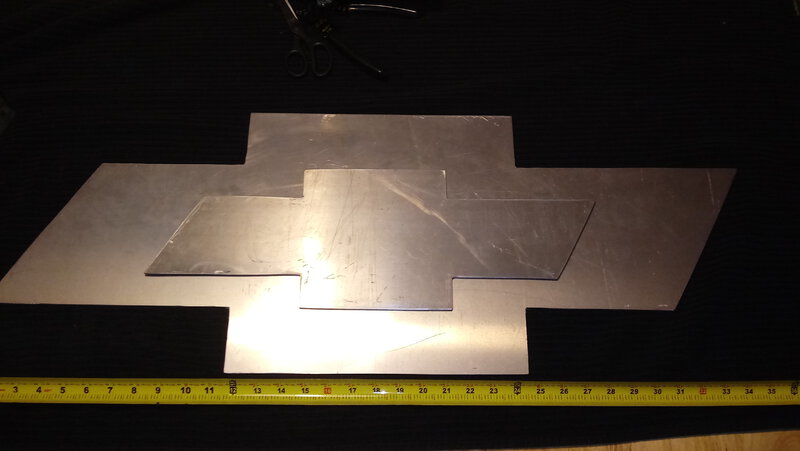
I did some polishing on the 2 bowties this afternoon. I still have a way to go, but they are getting there.
sure looks purdy!
I will post pics once its installed. It may be a while though. Its going to rain for several days.
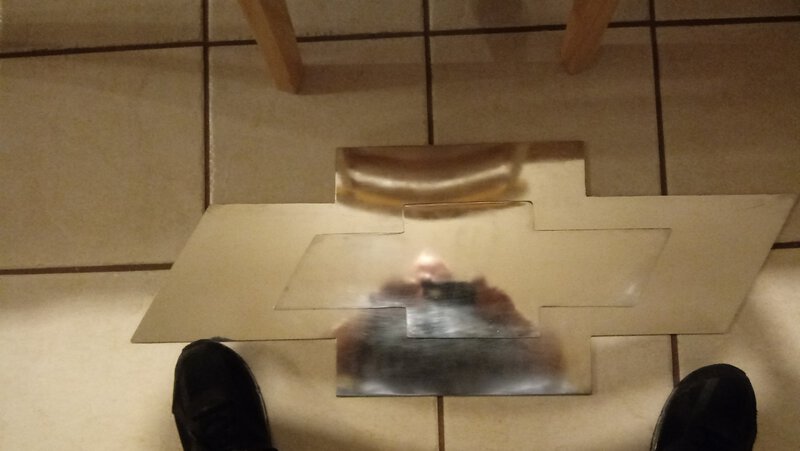
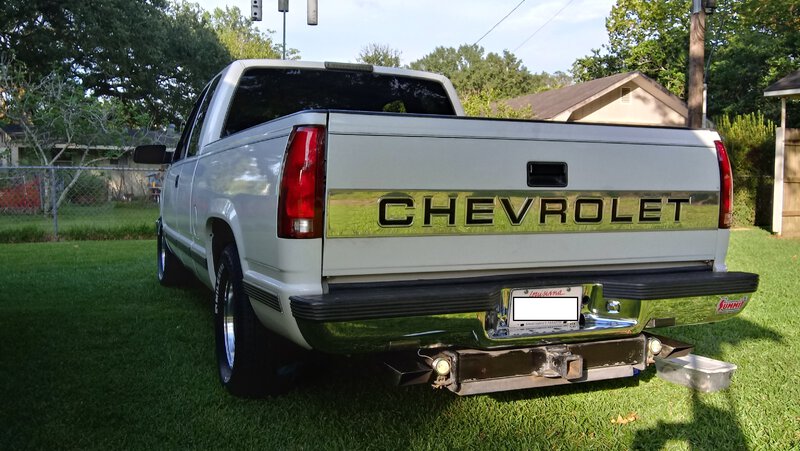
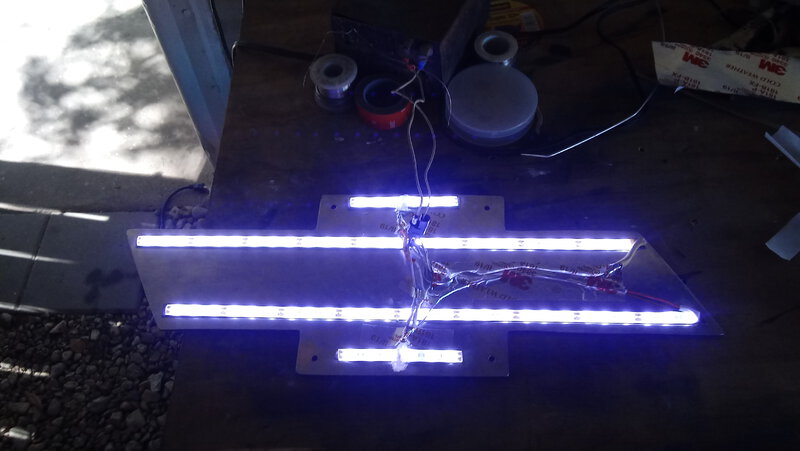
Buffed out the rims, and did a final buff out on the large bow tie, and painted the small one. I also installed the rivet nuts in the hood to bolt the bow ties to, after I sprayed bed liner under the hood, where the old insulation was. Oh and I shined the banner on the tailgate, and buffed the rims too. Now I need to wait for the paint to set up, on the black bow tie before I install the LEDs.


Last edited:
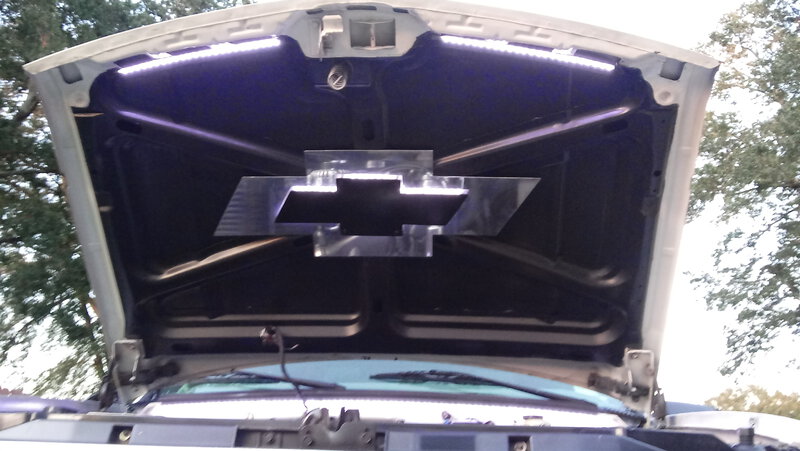
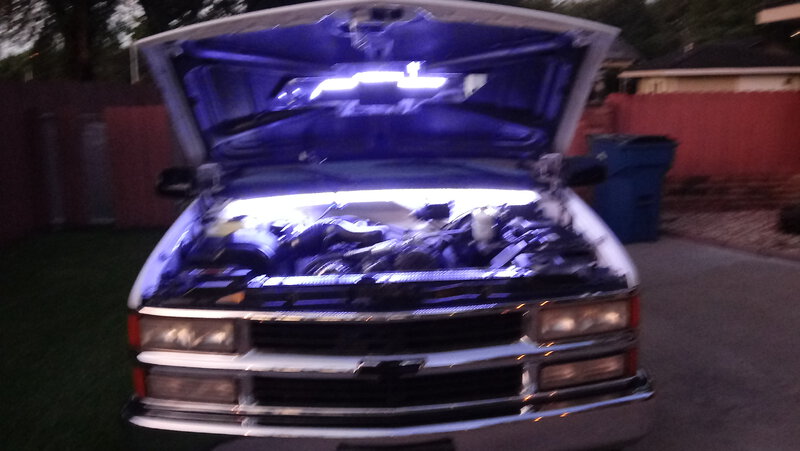
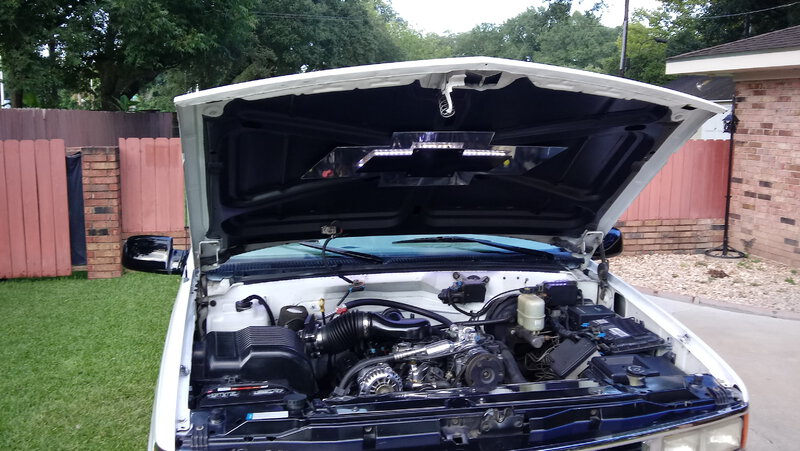
Well it took me 2 days, but I finally got the bow ties and LEDs installed. It was a royal PIA, but it looks good now that its done. I used the OE mercury switch so the lights come on as you open the hood, and go off just before the hood closes.
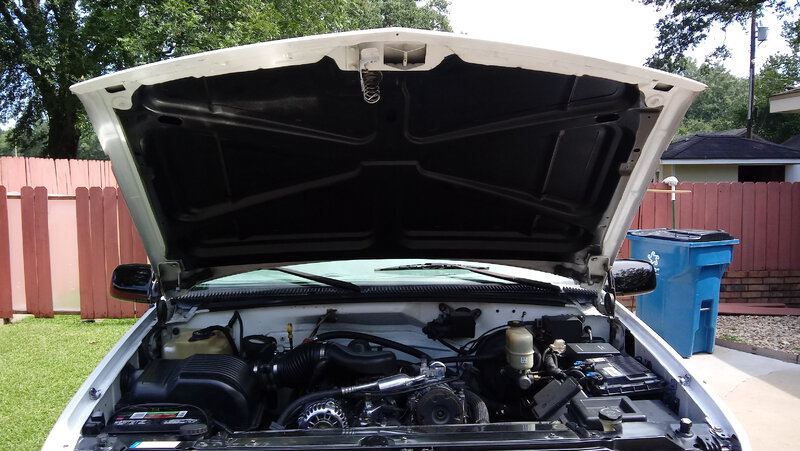
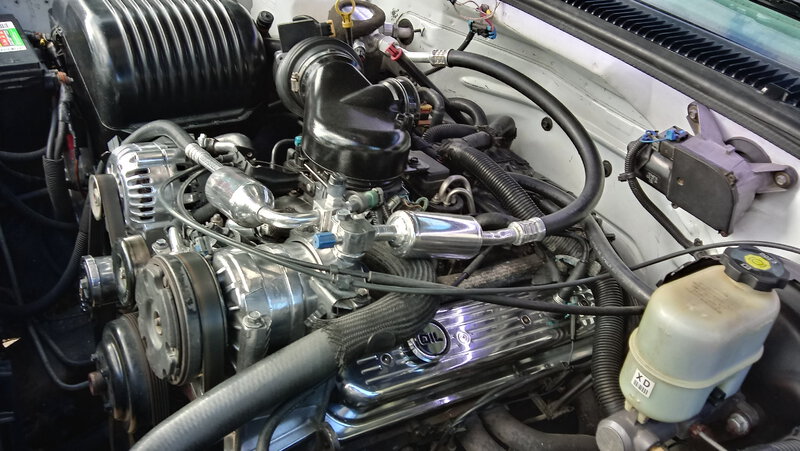
Well, I finally got some polished aluminum valve covers, and installed them. It took me 2 1/2 hours to swap out the OE valve covers, because of all the stuff in the way, and the triming and modifying I had to do. The valve covers are cast aluminum, with ball milled fluke grooves.

Looks great, looks like a lot of elbow grease required, how much time? What product are you using for polishing? I bought some for my 292 '55 Tbird valve covers and they turned out about the same, hard to get into the casting seams and after the winter they oxidized so I need to do again.
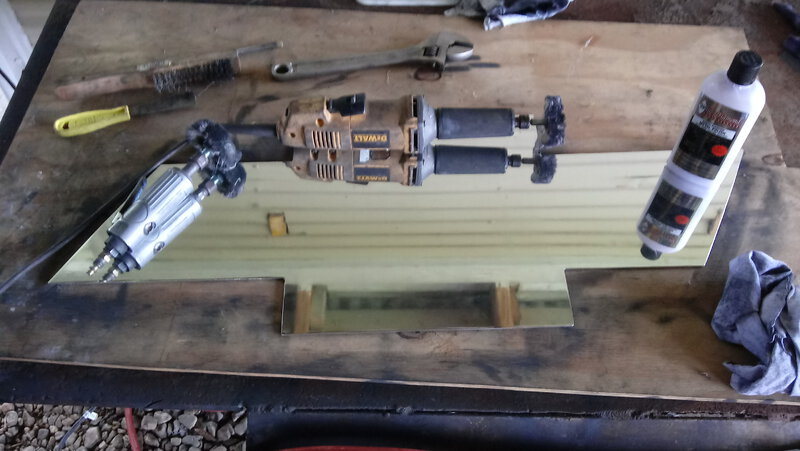
Well, it is a process. First I started with some brown rouge on a cotton buff, them some white jewelers compound on another cotton buff. Then a final buff out by hand with some white diamond metal polish. The white diamond metal polish does take a good bit of hand buffing, but the results are fantastic. The whole process is a little like doing paint work. The more prep time you take, the better the results. This can all be done with a die grinder, but I also have an electric straight head grinder. The motor is the same as a 4 1/2 inch grinder, sander. It has a lot of power. I also use a bench grinder with a cotton buff wheel, using the same rouge, and white jewelers polish. The white diamond polish leaves a proticitive coating that will seal the aluminum but like any polish, you have to repete polish from time to time. You can see in these pics, the straight grinder with a cotton buff on it, that I used on the bow tie hood light I built. I sanded the aluminum with some 400 sand paper, then buffed it out with some white jewelers polish on that buff. Then I finished it off with white diamond metal polish.
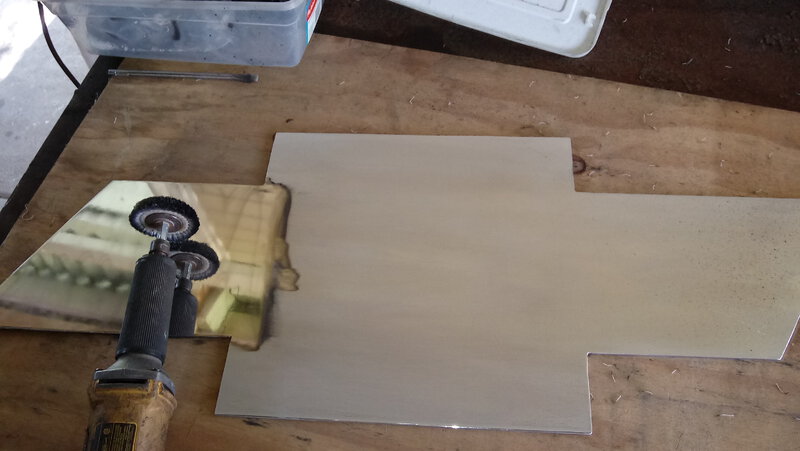
Oh, and the valve covers came polished. They are cast aluminum. I just went over them after installing with white diamond metal polish. To polish the bow tie didnt take long at all. Maybe 20 mins. It took longer to sand it. That took about 30 mins. Flat surfaces are easy to do. The more angles and small spaces, the harder it is to do. I pulled my throttle body the other night, and polished it out. I spent about 1 1/2 hours fooling with it. I used my bench grinder with a cotton buff, and some white jewelers polish, then some white diamond. It was hard to get into all the groves, but it looks good once I installed it.
JuniorToyota
New Member
The under hood looks great! Thank you for the inputs. I hope I have that patience to do mine.
Related Content You Might Like: